

“It took me years and years of trial efforts to work out that there is absolutely no knitting triumph I can achieve that my husband will think is worth being woken up for”
Stephanie Pearl-McPhee

This is a post about knitting – to be precise, it’s a knitting pattern. So if this isn’t your thing (and I expect that’s most of you) then you’re probably better off going to get a cuppa or wash the kichen floor. On the other hand you may decide that this is a welcome distraction…
If you’re still here, don’t say you weren’t warned. My only apologies are to the people who’ve got in touch with me to ask how they can make the mittens, having seen the pictures I’ve posted on Instagram and Twitter. To you I say: this pattern has evolved slowly by a method of trial and error. I’ve never tried to write down knitting instructions before and I’m aware that my style may be a little odd, but hopefully it will make sense.
I should stress that the pattern is for experienced knitters (and so my list of abbreviations and my garbled explanations of some techniques are most likely redundant). If you can manage double pointed (or circular needles) and knit stranded colourwork then you shouldn’t have any problems.
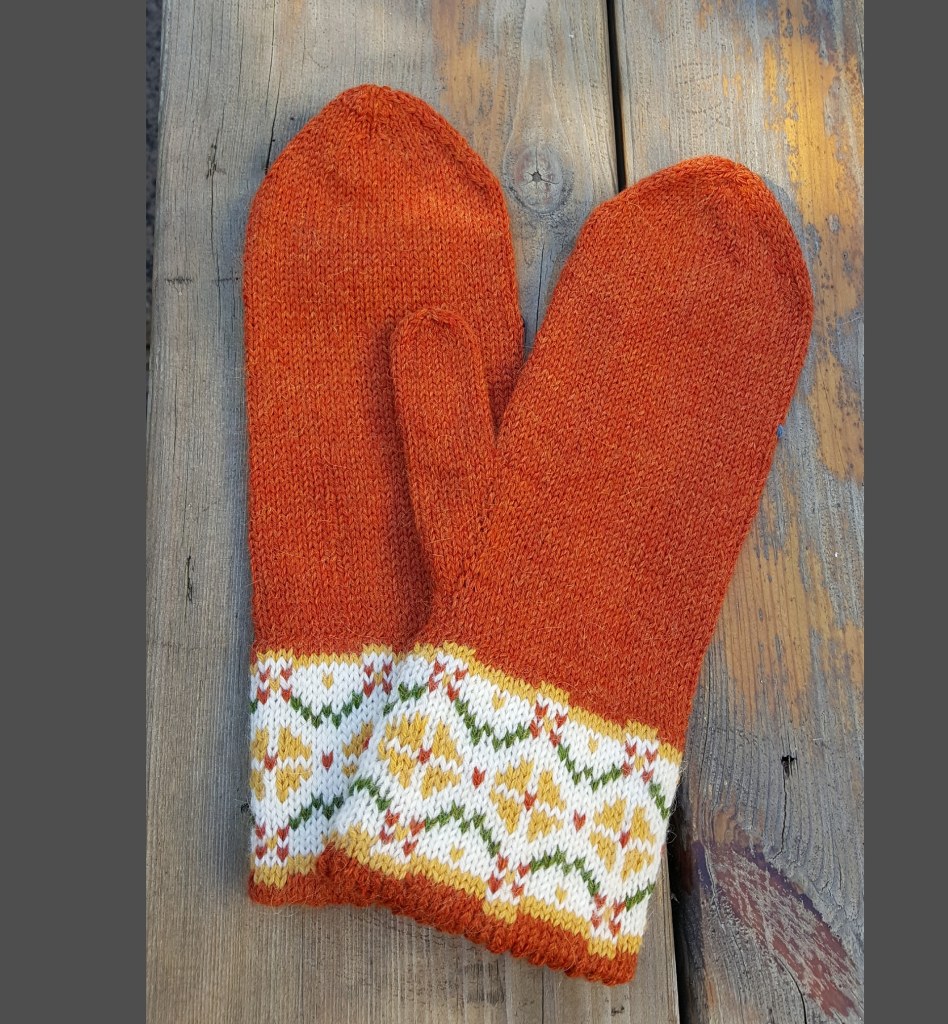
So, to the mittens…not particularly keen on rib (working it or looking at it) I began to think about the idea of using a picot edging and false hemming technique to form a double thickness cuff, and then to use decorative colourwork on the outer cuff – this way the strands that would otherwise be a hazard to fingernails or rings would be hidden within. And as my friend Susie remarked as we were discussing this in the pub, decorative cuffs could look almost like a form of wrist jewellery.
My first few attempts used charts from a couple of books – Andrea Rangel’s AlterKnit and 200 Fair Isle Designs by Mary Jane Mucklestone; but then I decided to have a go at drawing my own charts. No expensive, professional software was necessary – I just played with Excel. The chart at the end of this post, for the Autumn Mittens, is the result of that playing around. The colours I’ve used can obviously be changed.
A note on measurements:
I usually cast on 60 stitches and use a stranded colourwork design which has a repeat that will divide exactly into 60; if the design has a different repeat (ie not 5, 6, 10, 12 or 15) I either adjust the number of cast-on stitches or adjust the design slightly. I’ve found that fewer than 54 stitches tend to make a cuff that’s a little too tight, but it completely depends on the pattern and on your tension.
Throughout I’ve described the pattern in terms of numbers of rounds, rather than a cm/inch measurement. Your tension may be different from mine – 20 of my rounds measure 5 cms.
Materials:
I use Drops Nord, a 4-ply (fingering weight) which is made from 45% alpaca, 25% sheeps’ wool and 30% polyamide. The mittens take about 50g (1 ball) for the main colour, plus oddments for the colourwork.
I use a combination of 5 double pointed (DP) needles and circular, all 2.5mm. I find that short circulars are best for the colourwork cuff (and essential for forming the double cuff) but elsewhere I prefer DPs (and short DPs for the thumb).
Abbreviations:
| M1R | Using the left hand needle, pick up the bar between the stitch you’ve just knitted and the next stitch, bringing the needle from the back to the front. Then knit into the front of this new stitch with the right hand needle |
| M1L | Using the left hand needle, pick up the bar between the stitch you’ve just knitted and the next stitch, bringing the needle from the front to the back. Then knit into the back of this new stitch with the right hand needle |
| k 2 tog | Put the needle knitwise through the next 2 stitches and knit them together |
| ssk | Slip the 1st stitch from the left hand needle knitwise, slip the 2nd stitch purlwise. Slip both stitches back onto the left hand needle then knit both together, into the back of the 2 stitches |
| yo | Pass the yarn forward so that it’s between both needles before knitting the next stitch |
THE PATTERN
The cuff
Cast on 60 stitches loosely with spare yarn (in a contrasting colour to the main colour). Change to main colour.
Row 1: knit to end
Row 2: purl to end
Row 3: knit to end
Join up to knit in the round, either with 4 DPs or a circular needle (I arrange my stitches so that I have 15 stitches per DP, using a 5th to knit with). The first 3 rows are now the first 3 rounds.
Round 4-30: knit
Round 31: (picot round) *k 2tog, YO*. Repeat to end of round.
Round 32-34: knit
Work the stranded colourwork pattern, following the chart.
A word on weaving in ends – the choice is yours, but I find it better to do this as I change colours, ensuring that there are no gaps at the junction of different colours. You can substitute a different colourwork design here, of course – just make sure that the chart is 27 rows so that it matches the inner cuff in length
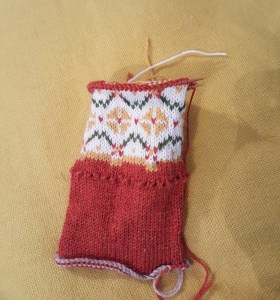
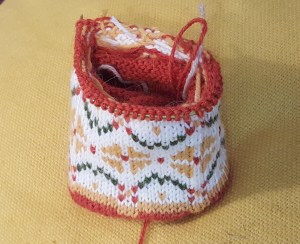
Fold the first 30 rounds inside, along the picot edge, to form the inner surface of a double thickness cuff.
Now the fiddly bit. With your outer stitches on a short circular needle, use another to pick up the innermost live stitches from the provisional cast-on. Once they’re all secure and you’ve counted to check there are 60, work around the cuff, using the set of DPs to knit together a stitch from the inner circular neeedle with the corresponding stitch from the outer circular needle.
Continue to knit another 5 rounds in the main colour.
You should now have a double thickness cuff with a neat folded hem and the messy wrong side of the stranded colourwork hidden away inside.

Breathe a sigh of relief!!
At this point I get the iron warmed up and press the cuff, just to settle the stranded colourwork down and deal with any little imperfections. I also have a celebratory chocolate biscuit.
The thumb shaping
My work is now on 4 DP needles; if you prefer a short circular needle (or the magic loop method, you freak of nature), then you’ll need stitch markers. I leave the placement of these up to you – suffice to say you’ll need to mark the beginning and ending of the thumb shaping.
But this is what I do –
Rearrange so that just the first 4 stitches of the next round are on 1 DP needle – the ‘thumb’ needle. (Sometimes I adjust this slightly to use the 4 stitches above the junction of the different rows of the colourwork design so that if there are any little ‘jogs’ they’re not in too obvious a place)
Divide up the remaining 56 stitches fairly equally between the other 3 needles.
Knit all the way around the work, then when you get to the 4 stitches at the thumb:
Increase round: k 1, M1R, k 2, M1L, k 1
You will now have 6 stitches on the ‘thumb’ needle.
Next and every alternate round: knit around with no increases
Increase round: k 1, M1R, k 4, M1L, k 1
You will now have 8 stitches on the ‘thumb’ needle.
Continue like this – every increase row you will make 2 more stitches – until there are 22 stitches on the ‘thumb’ needle (or 18 within your markers on a circular needle).
Work one round, rearranging your stitches as you go – the central 18 thumb stitches need to be kept secure on a piece of contrasting yarn for now. (As you look at your work, knit the 2 stitches to the left of this thumb section onto the beginning of the 1st DP needle – or continue on the circular needle; knit around your work until you reach the 2 stitches to the right of the thumb section, and knit those onto the end of your 4th DP needle – or continue on the circular needle). You’ll now be back to 60, with 15 stitches on each DP needle.
The hand of the mitten
Knit 35 rounds
The shaping for the fingers
In the interests of clarity, I’m calling the 1st DP needle (along the inner edge, above the thumb), DP 1, the next DP 2 etc. If using a circular needle, place markers to identify the inner and outer edges of the mitten. Your decreases will be either side of the markers, with a one stitch ‘buffer’
Next round:
DP1: k 1, ssk, k 12 DP2: k 15 DP3: as DP 1 DP4: as DP2
You now have 58 stitches. You’ll notice that you no longer have an equal number of stitches on each needle (!)
Knit 2 rounds
Next round:
DP1: k 1, ssk, k 11 DP2: k 12, k 2tog, k 1 DP3: as DP1 DP4: as DP2
You now have 54 stitches
Knit 2 rounds
Next round:
DP1:k1, ssk, k4, ssk, k4 DP2: k5, k2tog, k4, k2tog, k1 DP3: as DP1 DP4: as DP2
You now have 46 stitches
Knit 2 rounds
Next round:
DP1: k1, ssk, k4, ssk, k2 DP2: k3, k2tog, k4, k2tog, k1 DP3: as DP1 DP4:as DP2
You now have 38 stitches
Knit 2 rounds
Next round:
DP1: k1, ssk, k2, ssk, k2 DP2: k3, k2tog, k2, k2tog, k1 DP3:as DP1 DP4: as DP2
You now have 30 stitches
Knit 2 rounds
Next round:
DP1: k1, ssk, k2, ssk DP 2: k1, k2tog, k2, k2tog, k 1 DP3: as DP1 DP4: as DP2
You now have 22 stitches
Knit 2 rounds
Next round:
DP 1: k1, ssk, ssk DP 2: k1, k2tog, k2tog, k1 DP3: as DP1 DP4: as DP2
You now have 14 stitches
Take up your trusty darning needle and thread it with the live yarn. Then pass this needle through all the live stitches, in a clockwise fashion. When you’ve gone through the final stitch, discard the DP needles, pull the yarn tight and you’re done (I usually go through a couple of the stitches again). Take the thread to the inside and secure as normal.
The thumb
Using short DP needles, pick up the 18 stitches left on the thread at the base of the thumb, then another 3 stitches from the main part of the mitten, just where it meets the thumb. Work 20 rounds.
Next round: *k2tog, k 1*. Repeat to end of round.
You have 14 stitches
Next round: *k2tog*. Repeat to end of round.
You have 7 stitches
Finish off by pulling the thread through all the stitches as you did at the top of the mitten. Secure.
The chart for the Autumn Mittens

I’d appreciate it if you let me know of any mistakes/ambiguities/moments of total incoherence. Thanks, and enjoy the knitting x
“Your best teacher is your last mistake“
Ralph Nader

D > Thank you for the trouble of such a detailed and interesting post. I’ve been wanting to develop some new products for the Hebridean Woolshed, and whilst – of course – I certainly wouldn’t be copying what you’ve done here in this post, you have inspired me to get down to work and look forward to the results.
You’re welcome! I’ve never been a serious knitter (hadn’t done it for years) but started to knit socks about 2 years ago. This spring I decided to have a go at mittens and it’s been really rewarding. Knitting is such a mentally therapeutic activity, don’t you think? Yoga for the brain, as they say.
I put the pattern out there for people to use, so feel free, though I expect you’ll come up with something special and I’d love to see pictures sometime x
J & D > Glad to see you! Your ears must have been burning – just yesterday we were wondering if all was well with you.
Hi, nice to be back! I did have a few issues last year – nothing major but just unsettling. All is well now, thank you for the welcome 🌹
Good to ‘see’ you! Skimming these instructions, they make sense to me. I do like the idea of the cuff rather than rib, so much prettier too. But, though I could do it, I almost certainly won’t. So many knitting and crochet projects – none finished…. 🤦♀️
Hi Sandra
I’ve been awol for a while – a few issues last summer that took me ages to move past. The knitting has been a great balm to my soul 🌹
Fabulous post Mrs B. I haven’t got the patience to attempt these but I appreciate your skill and fine workmanship!
Thanks 😄